How to Use the AI Coding Tool Cursor to Improve Programming Efficiency?
00:00:00-00:00:30
Today, we are examining Cursor, a novel code editor that is based on Visual Studio Code but incorporates AI features directly, enabling you to code significantly faster. In my previous video, I replicated the same application twice: initially using Cursor and subsequently relying on my own expertise and resources from Google. I discovered that Cursor accelerated my coding speed by two and a half times. This observation is noteworthy given my extensive coding background, indicating that Cursor can substantially enhance your coding efficiency.
Now, let’s explore the unique aspects of Cursor.

00:00:30-00:00:35
To begin using Cursor, you should first download it by visiting cursor.com.

00:00:35-00:01:32
And there’s a button you can download it, install it again. It’s quite similar to Visual Studio Code with some additional features. So if you’ve used VS Code, you’ll feel right at home.
Now, you can use it for free to some extent, and you can also bring API keys from other services like OpenAI or Anthropic. However, I highly recommend the $20 a month Pro plan because you get some additional features and essentially unlimited usage of some of the best models like Claude Sonnet 3.5. You’ll quickly see your return on investment with that, even if you’re already using AI like ChatGPT to code, because this is significantly faster.
So when you first open this up, it’s going to look quite familiar if you’ve used VS Code before, and you’re able to just write code here. You’re able to set your different theme and you can actually import some of the plugins and other things that you would have in VS Code. So they’ve designed it to be a pretty smooth transition.
To demonstrate how Cursor works, I’m going to be iterating on the application that I’ve

00:01:32-00:02:04
In my previous video, which is titled “Quircon” or “QR Contact,” I demonstrated a method for swiftly exchanging contact information via a QR code. I am now introducing a new feature that will enable users to associate profile pictures with their various contact cards. We will utilize Cursor to assist in writing the majority of the code.
There are several ways in which AI is integrated into this system, and the first method I will demonstrate involves using the command or control K to highlight code.

00:02:04-00:02:15
And then, if you press Control K, you’ll be able to write instructions for the AI to iterate on the code or to consider the code and perform a task as you desire.

00:02:15-00:04:16
In this section, we can, for example, highlight this code, which represents the delete button. Let’s say we want to add more padding to this button. Okay. It will then proceed to make some adjustments. You can see here that it removed some code and added some new code, effectively making the process similar to reviewing pull requests from an AI. We can accept that change. Subsequently, we will observe that the trash icon has moved.
The advantageous aspect of using cursor is that we can undo these changes. If I press Ctrl Z, it will revert to the edited state. I can then review my code again, returning to the previous version and ignoring the changes made. Ctrl K is a useful tool for making precise, targeted adjustments. However, the most powerful feature I often use is Ctrl or Command L. Pressing Ctrl L will summon the chat window visible on the right. I liken this to chat GPT with added benefits.
One of the cool features of cursor is that it already knows your codebase when you open a project; it indexes all your files for quick reference during changes. You also have the option to control which files to reference when requesting changes, preventing it from searching the entire codebase and getting confused by excessive context. You can focus on specific files and the desired context for the changes you want to make.
For instance, when making this change, by default, the chat window references the open file, which you can see here as the card list. Now, let’s say we want to modify this card list so that the QR code appears on the left, followed by the title and other details.

00:04:16-00:05:30
We need to adjust the layout so that the description is on the right instead of being vertical. Let’s specify the changes we want to make.
I’m considering the design and what I want, and I’m unsure about the placement of the trash icon. Instead, let’s replace it with a menu icon, similar to the three dots that can be clicked, and include a delete option within that menu.
Let’s proceed to add this to the code. We can request multiple changes in this chat. When ready, we’ll use the context of this card and request those changes.
The code has been written for us using Claude Sonnet 3.5, which I’ve found to be the best model for coding as of August 24. This has been a significant improvement.
Now, we have the generated code. If you used ChatGPT, you would need to replace the existing code portions with the new code, which would require significant time integrating the changes. However, with Cursor, we have an apply button that will…


00:05:33-00:05:39
integrated directly into our code. This allows us to review the changes made and

00:05:39-00:06:06
Please continue to accept and observe its appearance. Honestly, it looks quite satisfactory. Notice that it meets our expectations exactly, replacing the cluttered interface with this compact menu with a QR code on the left and a description on the right. Everything seems well organised. However, one problem I noticed is that after clicking into this menu and then clicking elsewhere, the menu does not disappear. Therefore, we need to revisit this aspect.

00:06:06-00:07:00
Cursor. And we’re going to ask the AI to iterate on that. I usually try to say something like “this looks good,” so that it doesn’t go and try to change a bunch of code. But then I’ll add the additional code that I want changed. So we’re just going to keep it going in this conversation, because the change that we want is related to the changes that it’s made.
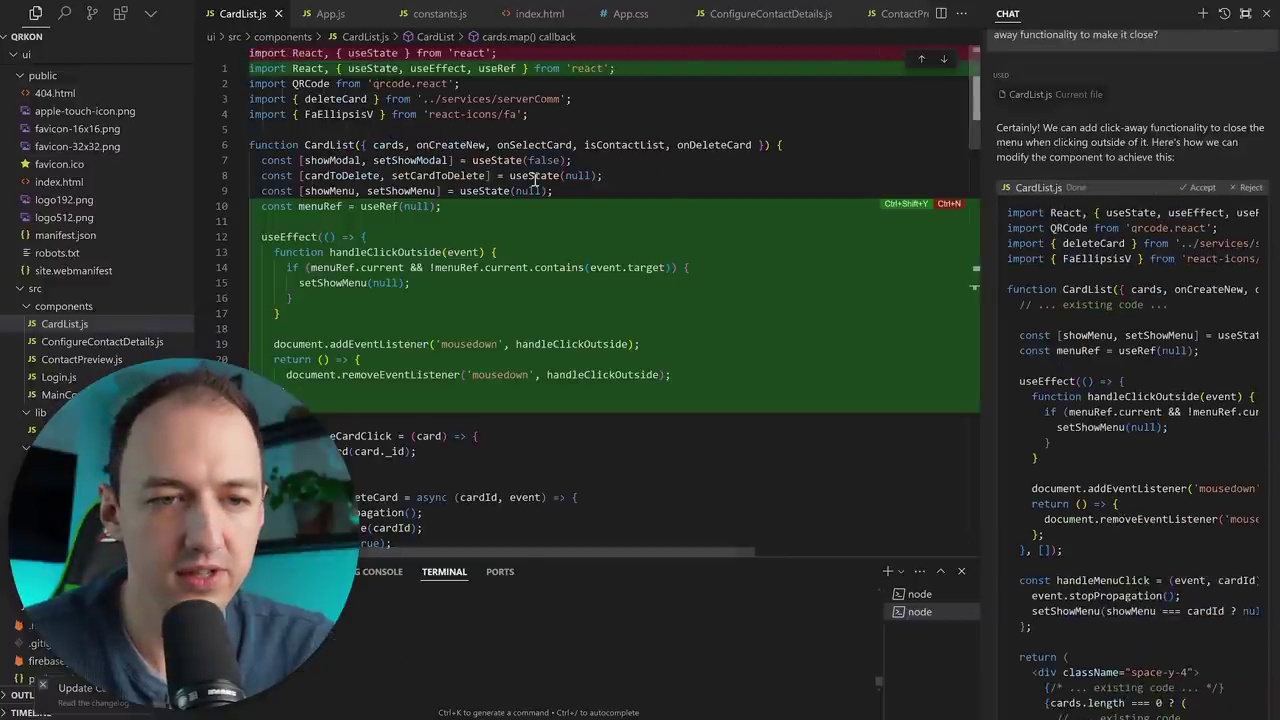
So I’ll just say, that looks great. But when I click away from the menu, when it is open, it doesn’t disappear. Can you add some click-away functionality to make it close?
This can be a good way to build a feature pretty much just in the chat box, where you have an idea in mind, you ask for the initial request, you see what the changes look like, and then you just iterate on that in that same chat until you pretty much get to a complete feature.
Sometimes you’ll want to start over, in which case you can just close this chat and open a new one. And then you’ll have fresh context. It’s like opening a new conversation in ChatGPT.
00:07:00-00:07:09
Okay, so it’s written some code for us. We’ll go ahead and apply those changes. All right, it’s using a useEffect here for the click-away functionality.

00:07:09-00:08:46
All right, now let’s test those changes. Now if I click here, click away, perfect. All right, that’s exactly what we wanted. Great, so we’ve made some small changes to this one file, but can we go beyond that? How do we change multiple files or add really big features?
Well, this chat window is capable of a lot more than just working on one file. We can actually tag different files and ask it to change those files or just use them as references so that it knows how to change the file that you’re on.
So to demonstrate this, let’s take a pretty big feature. We’re going to want to allow users to upload images that they can use as part of their cards so that when they share this contact information, you can see the picture of the person that’s actually sharing it. But that’s going to involve a lot of different pieces, right?
We’re going to need to change the configuration page, we’re going to need to validate the files, need to send it to the server. The server is going to have to upload it to some kind of file storage bucket and verify that, you know, it’s an image and it’s not too big. We’re going to have some security features. There’s a lot of different factors that are at play here, but I want to show the power of cursor and how we can really quickly make a lot of those changes.
And they’re not going to be perfect, but they’re going to get you like 80% of the way there. And then if you know how to code already, you’re going to be able to make up that last 20% very quickly. And usually it’ll be just by asking cursor to change some things again.
So let’s go ahead and make a request to modify multiple files to add

00:08:46-00:09:46
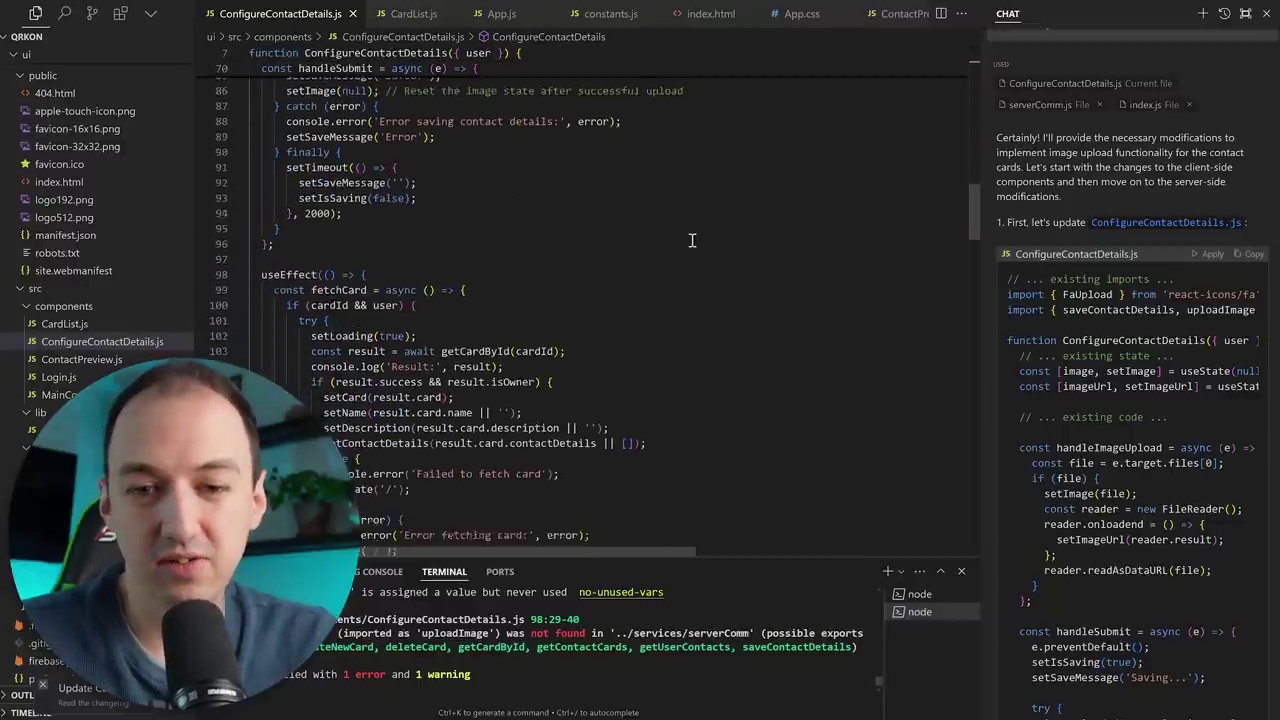
This is a significant feature. Let’s review the request I drafted. We aim to enable users to add images to their contact cards. To achieve this, we need to include a button on the configuration page, allowing them to select an image for upload. When the user saves the card, we will transmit the file to the server, which will store it in a storage bucket and append the image URL to the card before saving it in the database. I will specify the GCP storage bucket to facilitate the coding process. We must modify this file to incorporate the upload feature. Communication should occur via the serverComm.js file to ensure the user token is attached during the request. Additionally, we need to update the server-side components to support this new functionality. Let’s proceed with these changes.
This is a significant feature. Let’s review the request I drafted. We aim to enable users to add images to their contact cards.
To achieve this, we need to include a button on the configuration page, allowing them to select an image for upload. When the user saves the card, we will transmit the file to the server, which will store it in a storage bucket and append the image URL to the card before saving it in the database.
I will specify the GCP storage bucket to facilitate the coding process. We must modify this file to incorporate the upload feature. Communication should occur via the serverComm.js file to ensure the user token is attached during the request.
Additionally, we need to update the server-side components to support this new functionality. Let’s proceed with these changes.

00:09:46-00:09:59
Now, we will write code for all these different files and go through them one by one to apply the changes. Let’s examine the modifications made.
Initially, we will edit the configuration page.
00:09:59-00:10:06
Okay, sure. I’ll apply all the changes. I’ll trust it for now, and if something goes wrong, I’ll address it then.
Okay, sure. I’ll apply all the changes. I’ll trust it for now, and if something goes wrong, I’ll address it then.

00:10:06-00:10:25
Just proceed forward, and we’ll make changes accordingly. Now, we’ll navigate to serverComm.js. We’ll implement modifications there. That seems satisfactory.
Subsequently, we’ll proceed to our server, where we have numerous updates to incorporate. Currently, we’re integrating Multer as a new library and utilizing Google Cloud.

00:10:25-00:10:34
Storage. That sounds good. And here’s a bunch of code that it wrote to actually upload the file and then use it. We’ll review all of this code.

00:10:34-00:10:52
Make sure it is secure. It recognises the need for these two new libraries. I can copy this and run it on my server. We’ll install both libraries. Looks good.
Make sure it’s secure. It recognises the need for these two new libraries**. I can copy this and run it on my server. We will install both libraries. looks good.

00:10:52-00:10:59
Okay, we’ll switch over here, let’s try adding new content.
Switching gears, let’s explore the addition of new content. This process involves integrating fresh ideas and information into our existing framework, enhancing the overall value and relevance of our work. Whether it’s through research, collaboration, or creative input, adding new content is a crucial step in maintaining engagement and fostering innovation.
As we proceed, we’ll consider various methods and strategies for effectively incorporating new content. This includes evaluating the source of the content, ensuring its alignment with our objectives, and determining the best way to present it to our audience. By doing so, we aim to create a dynamic and enriching experience that keeps our audience informed and inspired.

00:10:59-00:11:37
Now, observe this, we have a button here, and as soon as I click it, it allows me to select an image. Let’s proceed and choose this one. It’s rendering something for me in the UI. Although it hasn’t been uploaded yet, we haven’t attempted to save it, you can see that we already have this functional image upload feature where I can select the file and it will display here. Before I click save to upload this, I am going to review the code because I want it to be uploaded to a specific bucket that I have designated for this purpose.
Now, observe this, we have a button here, and as soon as I click it, it allows me to select an image. Let’s proceed and choose this one. It’s rendering something for me in the UI. Although it hasn’t been uploaded yet, we haven’t attempted to save it, you can see that we already have this functional image upload feature where I can select the file and it will display here.
Before I click save to upload this, I am going to review the code because I want it to be uploaded to a specific bucket that I have designated for this purpose.

00:11:37-00:11:39
Let’s examine how that code functions.

00:11:39-00:11:45
Okay, I’m just going to press undo quickly to review the changes, which will highlight them for me.

00:11:45-00:11:57
Image Upload Process
Image upload occurs within the handleSubmit function. We will proceed to make a request with the card ID and the image, and we will obtain the image URL from the response.

00:11:57-00:12:09
That, and then we’ll call the API to save the card. I think that’s very reasonable. So again, just Ctrl-Enter, you’re able to accept all of the changes, or you’re able to go line by line.

00:12:09-00:12:32
And then make changes as you wish. Let’s see what bucket it’s trying to use and then we’ll ensure that it’s properly set up in Google Cloud.
Okay, so it appears that it’s looking for the bucket we have specified in our environmental variables. I think that’s perfectly reasonable.
Okay, so I’m going to proceed and add this to my ENV file so that we can provide…

00:12:32-00:12:45
Properly upload to the bucket I want. Okay, I’ve set up the bucket as far as I can tell, so let’s see what happens when I try to save this with an image, let’s call it. Right, saving.
Properly upload to the bucket I want. I’ve set up the bucket as far as I can tell, so let’s see what happens when I try to save this with an image, let’s call it. Right, saving.

00:12:45-00:12:58
It seems to take a little while, and then we encountered an error. Let’s take a look here. Right now, it appears to be attempting to connect to the database, but it crashes.
It seems to take a little while, and then we encountered an error. Let’s take a look here. Right now, it appears to be attempting to connect to the database, but it crashes.

00:12:58-00:13:23
Let’s try to figure out what’s going on here. I’m going to reiterate on the issue that occurred previously. I’m receiving this error and have a clue about what might be happening.
Let’s ask the AI to troubleshoot it for us. This seems promising, but I encounter this error. Do we need additional changes?
The error suggests that the DB object is undefined. Update error.

00:13:23-00:13:26
Version of index.js. Let’s check it out.
To review the version of index.js, follow these steps:
- Locate the File: Ensure you are in the correct directory where
index.jsis stored. - Check the Version: If the version is specified within the file, open
index.jsand look for a version comment or declaration. - Version Control System: If you are using a version control system like Git, you can check the commit history to see the version history of
index.js.
Here’s a simple command to view the file using cat in a terminal:
cat index.js
Or, if you are using a code editor, simply open the file and look for any version-related comments or metadata.

00:13:26-00:14:10
Changes made. First, it will try to catch the error and then error updating the URL. Here, it looks like updateCardImage. This method doesn’t look very clean because we actually have a database file, so let’s ask it to use that instead.
I’m going to press Ctrl Z to remove those changes and keep the last ones. Then, we’re going to ask it to use our database file and update that as necessary.
I see the problem; we should use db.js to handle database interactions. Let’s change the server and the db file.

00:14:10-00:14:24
Alright, so we’ll go here and apply some changes there. We’ve added a new method for us, which is going to be to update the card, and then back to index.js. We’ll go ahead and apply these changes.

00:14:24-00:14:31
Now, we will proceed to utilize the database connection.

00:14:31-00:14:59
Properly. All right, let’s try to save again. There we go, it actually saved this time. If we look at this, it logged our card. It says “with image” and then it has the image URL that should be in the database. Amazing.
So if we go back and then we go to the “with image” card, we don’t yet see it. So let’s keep iterating. We’ll keep adjusting this so that it actually shows the image. I’m pretty confident that it saved it. It just needs to be saved.

00:14:59-00:15:17
When we first open the card it needs to be rendered. At this point, the chat on the right has become lengthy, and I think it would be more efficient to restart the conversation with the AI and provide the necessary context. This approach helps avoid confusion by focusing on the specific files that need to be modified.

00:15:17-00:15:48
These previous changes that have been made. So we’ll start a new chat and return to this Configure Contact Details. Here, I’m outlining what is currently happening and what I want to occur, allowing it to determine what changes are necessary. I’m not prescribing a detailed solution because I won’t spend too much time on it, but if it encounters difficulties, I will provide more specifics.
Here are the changes, go ahead and apply them; it seems quite straightforward. Essentially, when we load the Card, we’re just going to use…

00:15:48-00:16:15
The image is already there, which is great. We’ll accept the change now. When we go in here, we see Clippy, perfect.
It was that smooth; in 10 to 15 minutes, we added the ability to upload images and retrieve them as needed. This probably would have taken a lot more time without the help of AI.
Now, let’s just clean this up a little bit and show this.

00:16:15-00:16:22
Near the top instead of being in the middle. Now, it’s going to rearrange some elements for us. We’ll apply these changes.
Near the top instead of being in the middle. Now, it’s going to rearrange some elements for us. We’ll apply these changes.

00:16:22-00:16:26
The image appears to be improved.

00:16:26-00:16:38
We can change the avatar. Let’s use another picture. Okay. Saved. Okay, it’s saved. Let’s see if it shows up again.

00:16:38-00:16:45
Yes, we have new pictures. If we look here, this is our storage bucket.

00:16:45-00:16:55
I can see those images that got uploaded. So this sidebar is really how I do a lot of the coding, and it’s really the workhorse for me. But there are some other features.

00:16:55-00:17:47
Which I find really beneficial as well. So now that we’ve made all of these changes, this file is getting a little bit too large, and I want to refactor it into something more manageable. And because I’m going to be creating new files, I’m going to show you one more feature that Cursor has, which is one of the more powerful newer features. And that’s called the Composer.
Now the Composer is really designed for doing all of these multi-file interactions. Sometimes it gets overwhelming and confusing because you can’t as clearly see the changes and revert them. But in this sort of situation, it can be a really quick way to create all these new files and keep things organized.
To activate the Composer, you might have to go to File Preferences, Cursor Settings, and then in the Beta section, it is this Multi Composer. So we’ll go ahead and open.

00:17:47-00:18:00
Using Ctrl-Shift-I, let’s ask it to refactor some aspects for us. The advantage of Composer is that it is able to process all of these files at once, albeit individually, but it’s actually better than…

00:18:00-00:18:11
Going through each file and modifying them, while also creating new files for me, which will be highly beneficial. Alright, so it’s extracting…
Going through each file and modifying them, while also creating new files for me, which will be highly beneficial. Alright, so it’s extracting…

00:18:11-00:18:22
We will create new files for each section and compare the differences. Let’s Boldly Accept All Changes and see how it goes.

00:18:22-00:18:32
We’re going to finish that one. So now we have all these extra files: ContactDetailItem, ContactDetailForm.

00:18:32-00:18:41
Let’s proceed and switch over, and it appears that many of these dependencies have been omitted. The compiler remains.

00:18:41-00:18:44
Work in Progress, Let’s Open It Back Up

00:18:44-00:18:48
and provide some feedback. Okay, it seems to be applying some
Feedback:
It appears that the system is attempting to apply certain adjustments or modifications. However, the specific details or outcomes of these actions are not clearly stated. To improve clarity and effectiveness, it would be beneficial to:
- Specify the nature of the adjustments: Clearly define what is being changed or applied.
- Detail the expected outcomes: Explain how these changes will impact the overall performance or functionality.
- Request specific feedback: Encourage users to provide detailed comments on the changes, focusing on both positive and negative aspects.
By addressing these points, the feedback process can be more structured and informative, leading to better understanding and potential improvements.

00:18:48-00:18:52
Some changes to those files. Well, I’ll be honest, this

00:18:52-00:19:27
The functionality didn’t perform as well as I anticipated, and I believe it will be quite challenging for me to rectify the form and understand the context in which it operates. Although the composer is a powerful tool, and I anticipate it will be the most effective method for managing cursors in the future, it currently presents some difficulties in determining what changes it will make and how. The scope is too broad, making it extremely difficult to revert changes when errors occur. Therefore, the composer remains in beta, and we will continue to refine it.
The functionality didn’t perform as well as I anticipated, and I believe it will be quite challenging for me to rectify the form and understand the context in which it operates. Although the composer is a powerful tool, and I anticipate it will be the most effective method for managing cursors in the future, it currently presents some difficulties in determining what changes it will make and how. The scope is too broad, making it extremely difficult to revert changes when errors occur. Therefore, the composer remains in beta, and we will continue to refine it.

00:19:27-00:20:01
Undo those changes. I went ahead and used CTRL+Z to undo those changes. Now we have some new files; I’ll delete those.
I think the scope of the changes it tries to make can be so large that some wires get crossed, and some of the models just don’t keep up with it yet. That’s why it’s in beta; they’re still developing this feature.
So, I’ll ask it to refactor things for me in the sidebar and keep it to something more manageable. Let’s move the image upload functionality into a separate file and then reference it here.

00:20:01-00:20:08
Let’s name the file “ProfilePicture” instead. All right, and then here’s how we

00:20:08-00:20:10
Great.

00:20:10-00:20:16
Great, so now when we go here, it still works as expected.
Great! So now, when we go here, it still works as expected.

00:20:16-00:21:06
After saving the changes, everything showed up correctly when I opened it, indicating that the refactoring process went well. The advantage here is that manual refactoring requires changing multiple values, but AI can significantly speed up the process. You can start with AI-generated cluttered code and also use AI to refactor it to make it cleaner and more organised. For now, we have implemented the ability to upload images, which we can view on the configuration page. However, the images do not show up in the preview, which suggests that further improvements are needed. I’d like to demonstrate another useful feature: the ability to integrate images. For example, you can capture design screenshots and integrate them.

00:21:06-00:21:34
It seems like you’re discussing a workflow for converting a design from a Figma file into code, possibly using a screenshot as a reference. Here’s a step-by-step guide on how you might approach this:
-
Capture the Design: Take a screenshot of the Figma design you want to convert into code. Ensure that the screenshot captures all necessary details, including layout, colors, fonts, and any interactive elements.
-
Analyze the Design: Look closely at the screenshot to understand the layout and components. Identify the main sections, such as headers, footers, content areas, and any specific UI elements like buttons, cards, or forms.
-
Set Up Your Development Environment: Open your preferred code editor and create a new project or file where you will write your HTML, CSS, and JavaScript.
-
Start with HTML: Begin by structuring your HTML to match the layout of the design. Use semantic tags to define sections like
<header>,<footer>,<main>, and<section>. Add classes or IDs to elements for easier styling. -
Add CSS: Style your HTML elements to match the design. Use the screenshot as a reference for colors, fonts, margins, and padding. You can use CSS frameworks like Bootstrap or Tailwind CSS to speed up the process if they align with the design.
-
Implement Responsiveness: Ensure that your design is responsive by using media queries or a responsive framework. Test your design on different screen sizes to ensure it looks good and functions well.
-
Add Interactivity with JavaScript: If the design includes interactive elements like dropdowns, modals, or form validation, implement these using JavaScript. You can use libraries like jQuery or frameworks like React if they fit the project requirements.
-
Review and Refine: Compare your coded version with the original Figma design. Make adjustments as needed to ensure the final output matches the design as closely as possible.
-
Test Across Browsers and Devices: Test your implementation across different browsers and devices to ensure compatibility and performance.
By following these steps, you can effectively convert a Figma design into a functional web page, even if the direct code exporting features from Figma aren’t working for you.

00:21:34-00:21:38
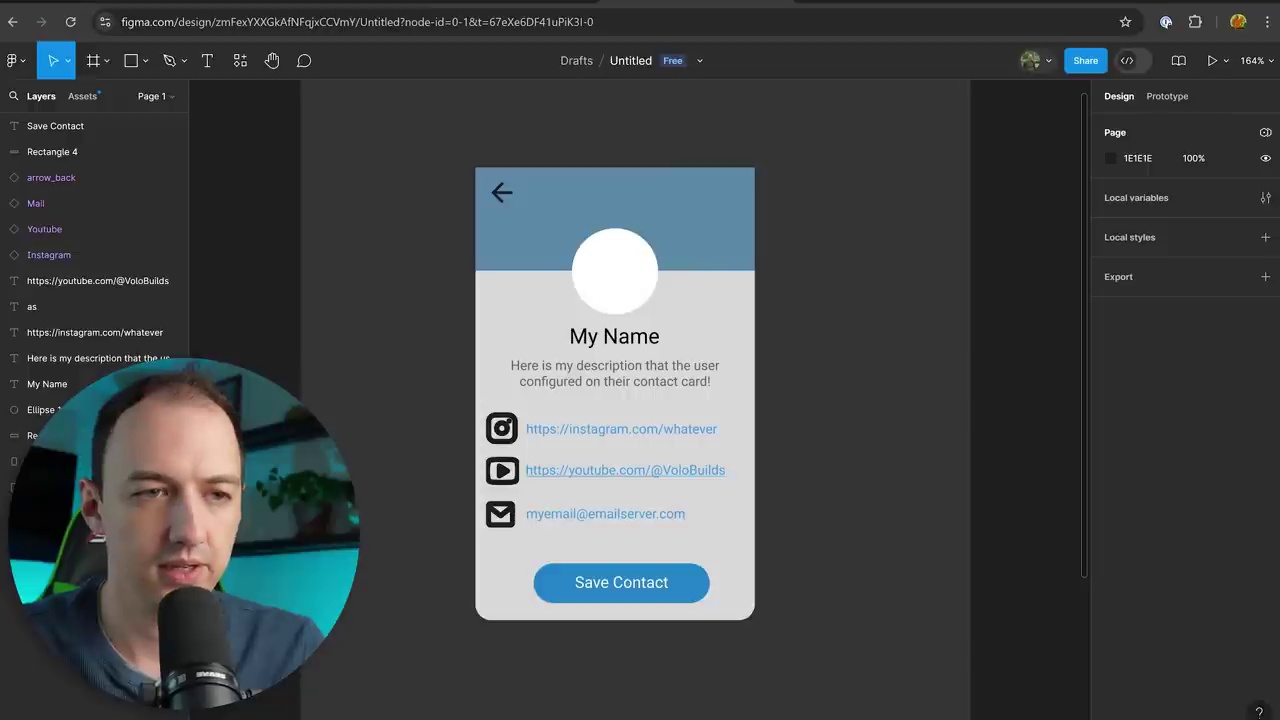
The method I prefer for this task is to capture a screenshot of the design.

00:21:38-00:21:55
And then we’ll flip back into the cursor. I’m on the ContactPreview card here, and I’m going to proceed with this design. Let’s indicate where the data is located.
00:21:55-00:22:00
Let’s give this a try. Alright, we have made several changes and will now review them.
Let’s give this a try. Alright, we have made several changes and will now review them.

00:22:00-00:22:07
To the browser and let’s see what the preview looks like. Well, it looks mostly correct except that…
To the browser and let’s see what the preview looks like. Well, it looks mostly correct except that…

00:22:07-00:22:34
The component is full width, so we need to control the width, for example, 400 pixels. We also want to center it, so let’s try using mx-auto. This is another powerful feature of CSS that auto-suggests properties, and now it’s indicating that it’s centered.
To achieve this, you can set the width of the component to 400 pixels and apply the mx-auto class to center it horizontally. Here’s how you can do it:
<div class="container mx-auto" style="width: 400px;">
  <!-- Your component content goes here -->
</div>
In this example, the container class can be any class you use for styling your components, and mx-auto is a utility class provided by frameworks like Tailwind CSS to automatically set the left and right margins to auto, centering the element within its container.

00:22:34-00:23:16
Looking a lot closer to what I wanted. Maybe we can also give it a max height. Let’s add a little border. Nice.
And by the way, I don’t know if you noticed that, but the editor just auto-completed a lot of that for me. So I just typed in “B”, and automatically it is suggesting “border”, “border gray”, “rounded large”, “shadow large”. So I can auto-complete that, and the way that it knows that is because it’s very familiar with Tailwind, it’s familiar with React, familiar with a lot of frameworks.
So there we go. This card is looking a lot nicer and closer to what I wanted. With one more prompt, we got the blue going halfway down, and we got that nice white border around the image.

00:23:16-00:25:07
This looks much more professional. Here, when I type “send,” it automatically recommends centering the text since I don’t remember the Tailwind class. I type “send,” and it suggests “text-center,” so my name is now centered. I didn’t need to look up the class name.
Another notable feature is auto-complete plus auto-tab, which predicts where the cursor will move next, aiding manual code editing without the sidebar. In this function, I have an if statement with multiple else-ifs. As an example, let’s convert this to a switch-case statement. I type “switch,” and it immediately predicts the rest of the line. Pressing tab predicts the next changes and lines. It switches to “email,” and I continue pressing tab. After formatting, I’ve converted all if-else statements to cases.
This might not be more readable; refactoring into smaller functions could improve it. Using control K, I select the code section and factor it. Now, we have a formatted value and specific formatting functions, making refactoring quick and easy.

00:25:07-00:26:11
Make text more readable. There is also a very useful feature, especially when working with large codebases. Since Cursor indexes all files, you can search the codebase more intelligently. In the sidebar, I can ask where the icons are set in my codebase and then press Ctrl+Enter to search through the entire codebase. It will iterate through all those files and provide the answer. In this case it is set in the index.html file pointing to the correct location. If you get lost in a large codebase, this can be a great way to navigate and understand how the files relate to each other. Once you have a better understanding of the codebase, I recommend tagging specific files rather than searching through the entire codebase. However, if you are completely lost and unsure of the location of something, this can be a useful approach.